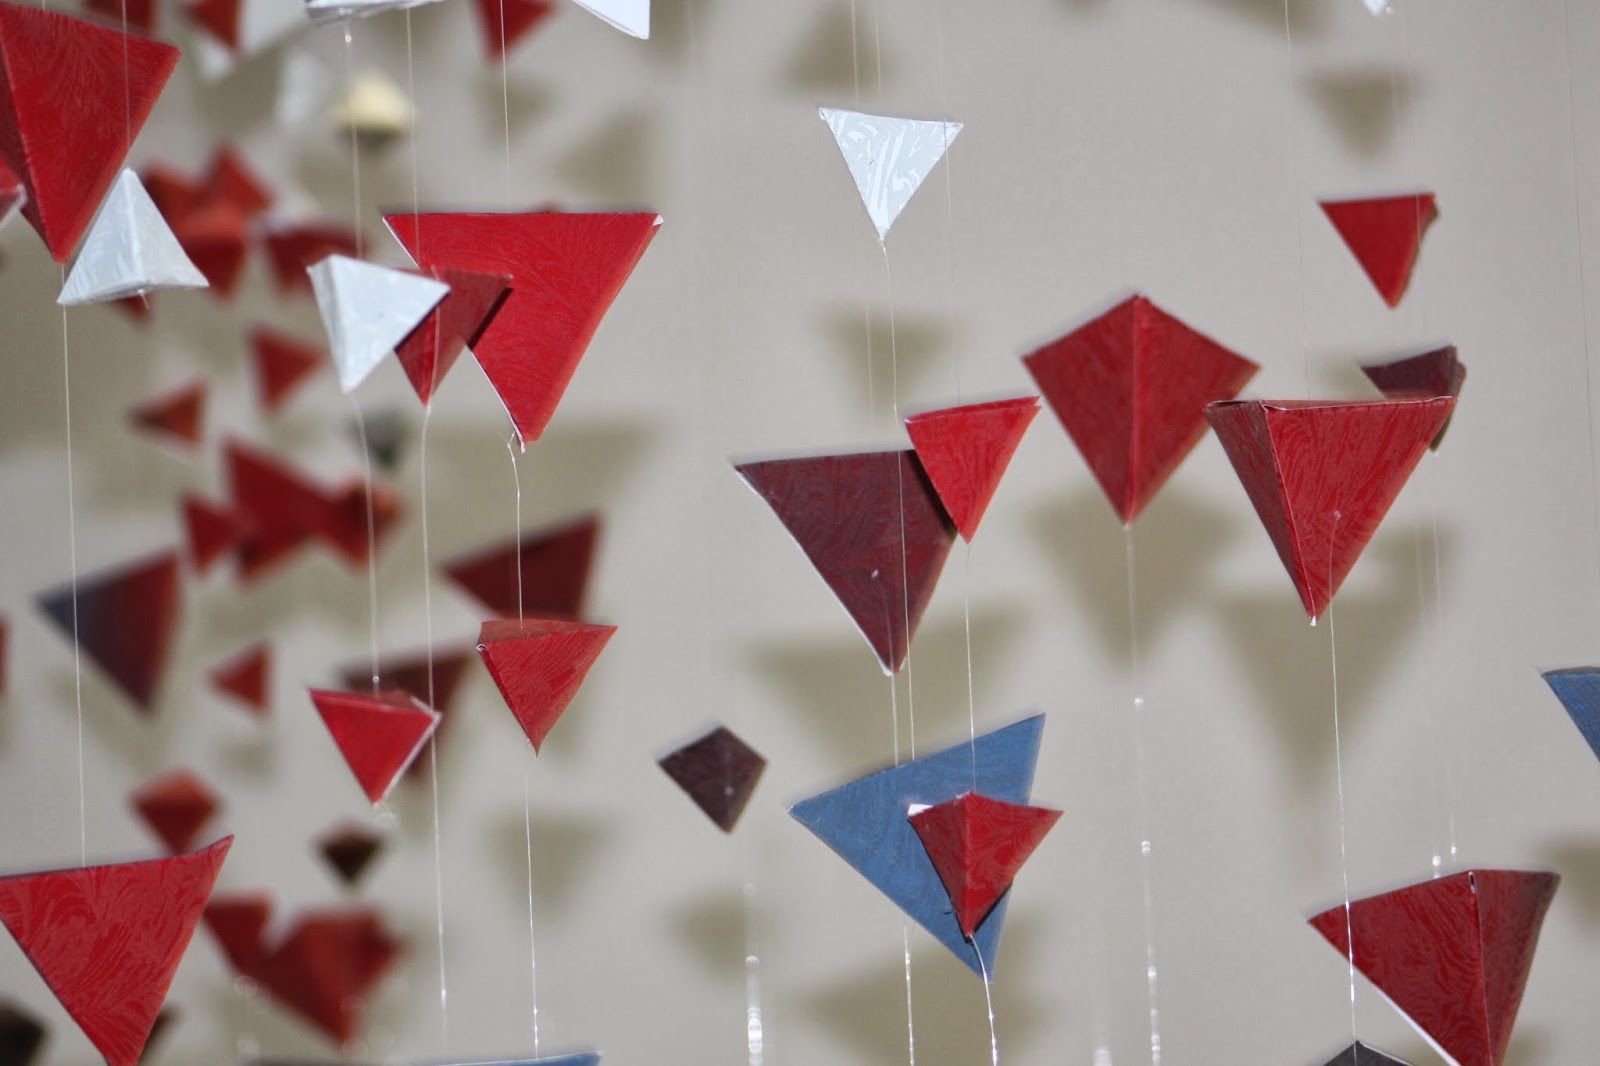
Finally finished this piece and I'm really happy how it turned out. But I found a lot of things I want to fix and add to it. Here is the final process.
Sunday, December 22, 2013
Monday, November 25, 2013
Silkscreen Class Project - Missing & Murdered Aboriginal Women Part 6
I had my critique and many good questions came out of it. Like my lighting and sound, I wish I had it set up a bit better but I'm quite happy how it turned out.
Here's the video for ambiance.
I'm not quite satisfied with amount of triangles I had cut out for my critique. However I realized that I am not done with this project I'll be interested with making the scale larger than what I have now.
Here's the video for ambiance.
I'm not quite satisfied with amount of triangles I had cut out for my critique. However I realized that I am not done with this project I'll be interested with making the scale larger than what I have now.
Tuesday, November 19, 2013
Silkscreen Class Project - Missing & Murdered Aboriginal Women Part 5
My final critique is this Thursday so I'm finishing all the other components for my installation; the drum, dusting, setup and final pieces. During this week I'm just happy to have all the pieces cut out and ready to be folded. I'm not entirely sure how many pieces I have here but I'm going to guess at least 1000 triangles.
 |
| Here is the layout. I traced a template and cut everything out with an exacto knife. Nearly cut my own thumb off. |
 |
| Slowly but surely getting there. |
 |
| So...many...triangles....! |
Saturday, November 16, 2013
Friday, November 15, 2013
Wednesday, November 13, 2013
Woodcut Printing - Oh my Deer Project Part 2
Working on my second layer I chose to go with a jaw dropping colour scheme. Blue over red, over orange. Slowly chugging along with this one.
Sunday, November 10, 2013
Silkscreen Class Project - Missing & Murdered Aboriginal Women Part 3
Recently I've been having trouble deciding how the pieces would connect around the installation. However after looking around for thin wire, I choose to go with chicken wire to help me attach all these pieces from various angles and length.
One of the interesting parts of my project this year was the questions of why in my sketch book did my women look like they were screaming. I would say the inspiration came from De Schreeuw (The Scream) Memorial in Oosterpark (Amsterdam).
Something about this memorial both scares and intrigues me, the figures mouth slowly closing in to the point of speechlessness. The events that revolved around this memorial can be read here. On another tangent, the purpose of my installation is to create a moment where the viewer is subjected to this feeling of uneasiness. Creating a place where the viewer is engaged suddenly and spatially interrupted, is what I want them to experience. Using this sense of uneasiness, I want to create a mimicking feeling when these women were taken or murdered.
NEXT UPDATE: The Cutting and Assembling Saga!
 |
| Couldn't believe RONA was having a sale on garden wire! |
One of the interesting parts of my project this year was the questions of why in my sketch book did my women look like they were screaming. I would say the inspiration came from De Schreeuw (The Scream) Memorial in Oosterpark (Amsterdam).
| Memorial/sculpture by Dutch sculptor Jeroen Henneman; Photo by User_talk:Gogh. |
Something about this memorial both scares and intrigues me, the figures mouth slowly closing in to the point of speechlessness. The events that revolved around this memorial can be read here. On another tangent, the purpose of my installation is to create a moment where the viewer is subjected to this feeling of uneasiness. Creating a place where the viewer is engaged suddenly and spatially interrupted, is what I want them to experience. Using this sense of uneasiness, I want to create a mimicking feeling when these women were taken or murdered.
NEXT UPDATE: The Cutting and Assembling Saga!
Friday, November 8, 2013
Supervised Independent Project - Movable Wave Project Part 4
Tuesday, November 5, 2013
Supervised Independent Project - Movable Wave Project Part 3
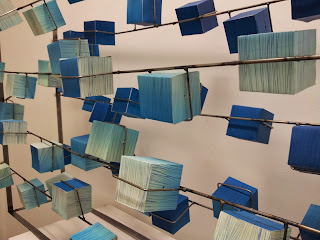
Moving on to my assembly this week. I've cut so many pieces of paper it's literally making me crazy. There are 112 pieces in total. Wow! Here is the process... not done yet!
Tuesday, October 29, 2013
Woodcut Printing - Oh my Deer Project
I currently have three projects ongoing right now. Ah thank goodness I've somewhat mastered time management. This is my project for my woodcut class as well. It's one of my favorite print methods: relief printing.
Monday, October 28, 2013
Silkscreen Class Project - Missing & Murdered Aboriginal Women Part 2
Working quietly on my images this week I had a couple of things happen to me when I was printing with UV base. My grey came out a bit darker than I wanted and the UV base gave me a bit of trouble when I was flooding and printing. Other than that I'm impressed with my triangle shapes so far.
 |
| Detail shot of my print with the texture. UV base over speedball. |
Sunday, October 27, 2013
Supervised Independent Project - Movable Wave Project Part 2
So this project has been on my mind for the last couple of months. So much planning went into is the first three weeks but these last three weeks have been great. I can actually say I'm impressed with how my concept came together. Just two more weeks and I'll be done! Wish me luck and I'll continue to show my process as I go!
 |
| I wasn't sure if it was going to work in screen and it didn't! Showing all the process I've been doing even the failures. |
 |
| Ah... switching to lithography. My love. <3 |
 |
| Offset press. |
 |
| I switched to photo plate and it's working out a lot better than the silkscreen. |
 |
| Printing over the speedball gradient. Not done yet one more layer. |
Wednesday, October 23, 2013
New Project for Silkscreen Class - Missing & Murdered Aboriginal Women
I imagine this to fit in a small room and have 5-10 figures that surround a circular drum. Eventually on my blogspot, I'll have the finished piece up. I'll be posting a video and some photos soon.
My materials I'm using are:
- 5 Coloured Speedball Ink.
- 230 Silkscreen mesh.
- UV base.
- Fishing Line.
 |
| Gradient Speedballing - With 5 colours |
Wednesday, October 16, 2013
Supervised Independent Project - Movable Wave Project
This is my final year at Concordia, so I've been thinking of applying for residencies and internships. But mostly I wanted to focus on this year are installations. So for my supervised Independent Project class I wanted to create a piece that was movable and reminiscent of a wave. I created a piece in my second year of sculpture that had a spiral moveable piece. I'll post the link when I have the picture.
I have various things going on this project but right now I'm focusing on the prints this week and welding the full pieces this Friday. Wish me luck as it's my first time welding.
I have various things going on this project but right now I'm focusing on the prints this week and welding the full pieces this Friday. Wish me luck as it's my first time welding.
 |
| Bending these guys 90 degrees. |
 |
| Process took me 3 hours not bad the technician at the metal shop really helped me. |
Wednesday, September 25, 2013
Embarrassing Moments in Montreal - Comic Draft
I posted a new project on my tumblr but I forgot to mention it here. Here is the comic I have been working on for the past 2 months. I contains 5 pages of my most embarrassing moments here in Montreal.
Going back to school has put a wrench in my gears for the moment but hopefully by December everything will be finished.
Going back to school has put a wrench in my gears for the moment but hopefully by December everything will be finished.
Friday, September 13, 2013
Tablet Test 2013
Warm Up Tablet Test. After three years with the same tablet I finally got a new one. Fresh new nibs are the best.
Monday, June 17, 2013
Starting a DIY Silkscreen Station
Being out of the studio for the summer I created a way to silk screen without going to a studio. Which cost me only 70 dollars for all the materials.

All my materials are a 8' by 10' inch silk screen, a halogen light, a kit of exposure base and a heat lamp.
The first thing I did was set up a base for where I would store my screen and my inks. I thought why not keep them in my closet. It's cool and dark in there.
I set up my light about 12 inches away from my table. Not bad since the exposure times were very quick.
I bought a cheap frame from the dollar store and set it up inside the screen to avoid the light from spreading. Also it's really important to have a black material underneath the light or the light will disperse every where.
Not bad so far, the bath tub did a great job of removing the emulsion.
The tests turned out great. Now to start printing on good paper!
Subscribe to:
Comments (Atom)


